A Complete Guide To Making Mortise And Tenon Joints
Mortise and tenon joints have been used for thousands of years by woodworkers across the world to join two pieces of wood. It’s an ideal type of joint to make cabinets, furniture, and other woodworking projects. As a strong and durable wood joint, the mortise and tenon joint can be used by both beginners and professionals.
Generally speaking, mortise and tenon joints are versatile, stable, and strong. Wood expansion and contraction caused by humidity and temperature changes have little influence on this type of joint. If build correctly and properly, the mortise and tenon joint also looks attractive and can act as decoration. However, because the mortise and tenon joint requires tight cutting and precise measuring, it is difficult to build.
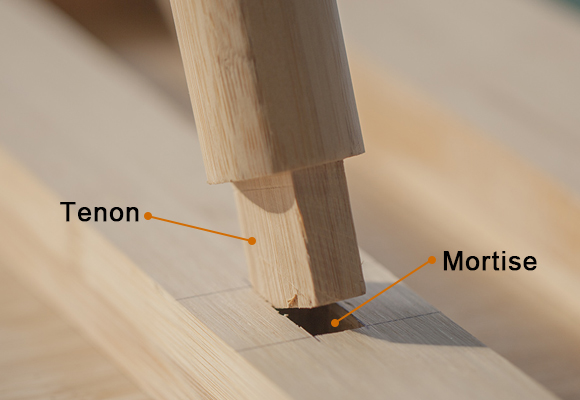
Though mortise and tenon joints include many variations, the basic form is simple, comprising the “tenon” tongue and the “mortise” hole. The tenon is precisely inserted into the mortise, forming a mortise and tenon joint. When the joint is formed, we can use glue to secure it or use wedges and pins to lock it in place.

More than 7000 years ago, mortise and tenon joints began to be used in wooden architecture and furniture, according to historical records. Let’s take a look at some examples. The earliest known application of the mortise and tenon joint was building the wooden lining of water wells in the Neolithic Linear Pottery culture. It was also found in the wooden planks of the “Khufu ship” which was a 143 ft long vessel of the Fourth Dynasty around 2500 BC. What’s more, the world’s oldest complete wooden architecture, which was a well near Leipzig also applied the mortise and tenon technique.
Archaeologists also found mortise and tenon joints in ancient furniture in Asia, Europe, and the Middle East, especially China. In ancient China, many wood components applied the mortise and tenon joint to interlock, such as roof frames, beams, struts, and brackets. Thanks to the joint, even if the wood expanded or contracted, these components wouldn’t crack. Cadota, a Silk Road kingdom, also used mortise and tenon joints for their furniture and houses from the first to the 4th century BC.
How To Create A Mortise And Tenon Joint?
Building a mortise and tenon joint may seem difficult for the woodworking beginner since it requires precision and tightness, but with the right tools, the process will be straightforward. For a pro woodworker, the mortise and tenon can be made by hand tools. However, power tools enable beginners to build mortise and tenon joints more easily.
Step One. Cut The Mortise First
Make sure the size of the mortise before you start the cutting. Usually, the thickness of the mortise equals 1/3 of the wood board’s thickness. The length should be 1/2 of the board’s width.
After determining the size, you can use a plunge router with an up-cut spiral router bit to create the mortise, ensuring a clean mortise bottom.
Step Two. Cut The Tenon
A table saw with dado blades can create tenons with accurate sizes and high precision. Before cutting, set the height of the blade for the shoulder and face cuts respectively. Use the fence to ensure the length of the tenon.
Step Three. Connect The Mortise And The Tenon
Woodworkers usually use glue to fasten the joints. Before applying, put the mortise and the tenon together to see whether they fit each other right. Then, drill dowels or pins, disassemble the joint, and apply the glue. Connect the mortise and the tenon again with a clamp and insert the pins. When the glue is dry, cut off the protruding pins and remove the clamps.